Accessible PowerPoints
- Use the default layouts.
- Use default slide titles.
- Add alternative text to images.
- Create accessible charts and graphs.
- Create accessible tables.
- Provide video captions.
- Create accessible content.
- Run the MS Office Accessibility Checker.
- Create an accessible PDF from PowerPoint.
- Enable real-time captions in PowerPoint.
Use the default layouts
One of the most effective ways to make PowerPoints accessible is to use the default layouts to create new slides. This ensures the content is in the correct reading order and has proper titles. Do not create new text boxes on slides (unless you're willing to check and edit the reading the order of the objects).
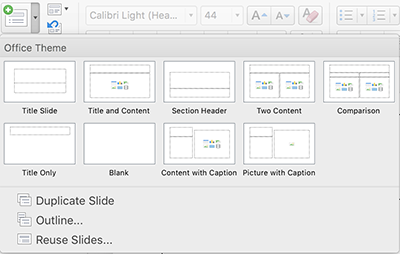
- On the Home tab, click the arrow next to New Slide.
- In the gallery of layouts, select the layout that you want for your new slide.
If you'd like a different layout for an existing slide, do not create a new text box. Instead, change the layout:
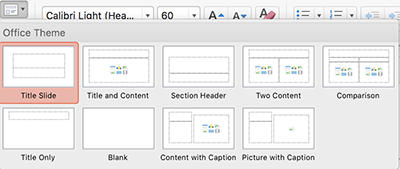
- In Normal view, on the Home tab, click Layout.
- Pick a layout that best suits the content of your slide.
Slide object reading order
If you must add additional content to a slide, you will need to check the reading order of the objects.
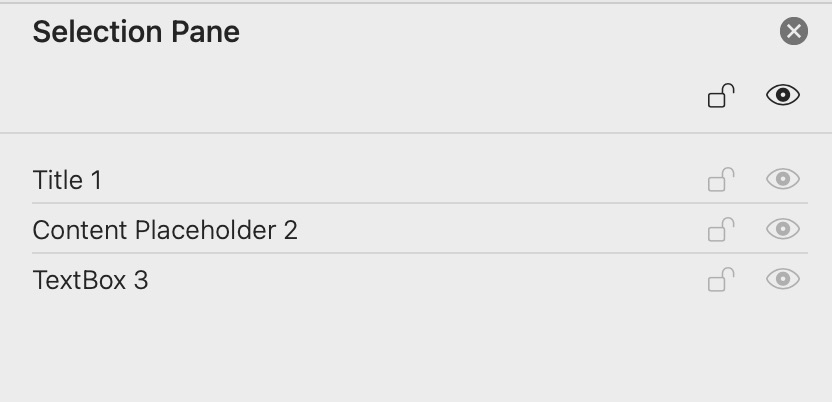
- On the Home tab, select Arrange then Selection Pane.
The Selection Pane will display in the right-hand sidebar. Drag the objects into the order you want them to be read. Note: The reading order for objects listed in the Selection Pane is from bottom (first) to top (last). The numbers indicate the order in which the object was added.
Use default slide titles
Missing slide titles are one of the biggest accessibility barriers with PowerPoint presentations.
- Every slide should have a unique and descriptive title, so that screen reader users know which slide they are on (for multiple slides with the same title, number them—for instance, "Trends, 1 of 4").
- Always use the title placeholder space (it says "Click to add title") on the default slide layouts. Never use text boxes to create slide titles.

Add alternative text to images
All images must have an ALT tag. In addition, images that convey meaningful information must have alternative text that describes them. Alternative text may be added in a caption, within the slide text or in the image's ALT tag.
To add alternative text to the ALT tag of an image:
- When adding alt text to images in a Microsoft Word PowerPoint, select the Alt text option in the top navigation bar.
Enter your text in the text entry box in the side panel. You can also use Microsoft’s built-in feature that will write alt text for you. You can also click the toggle to mark the image as decorative.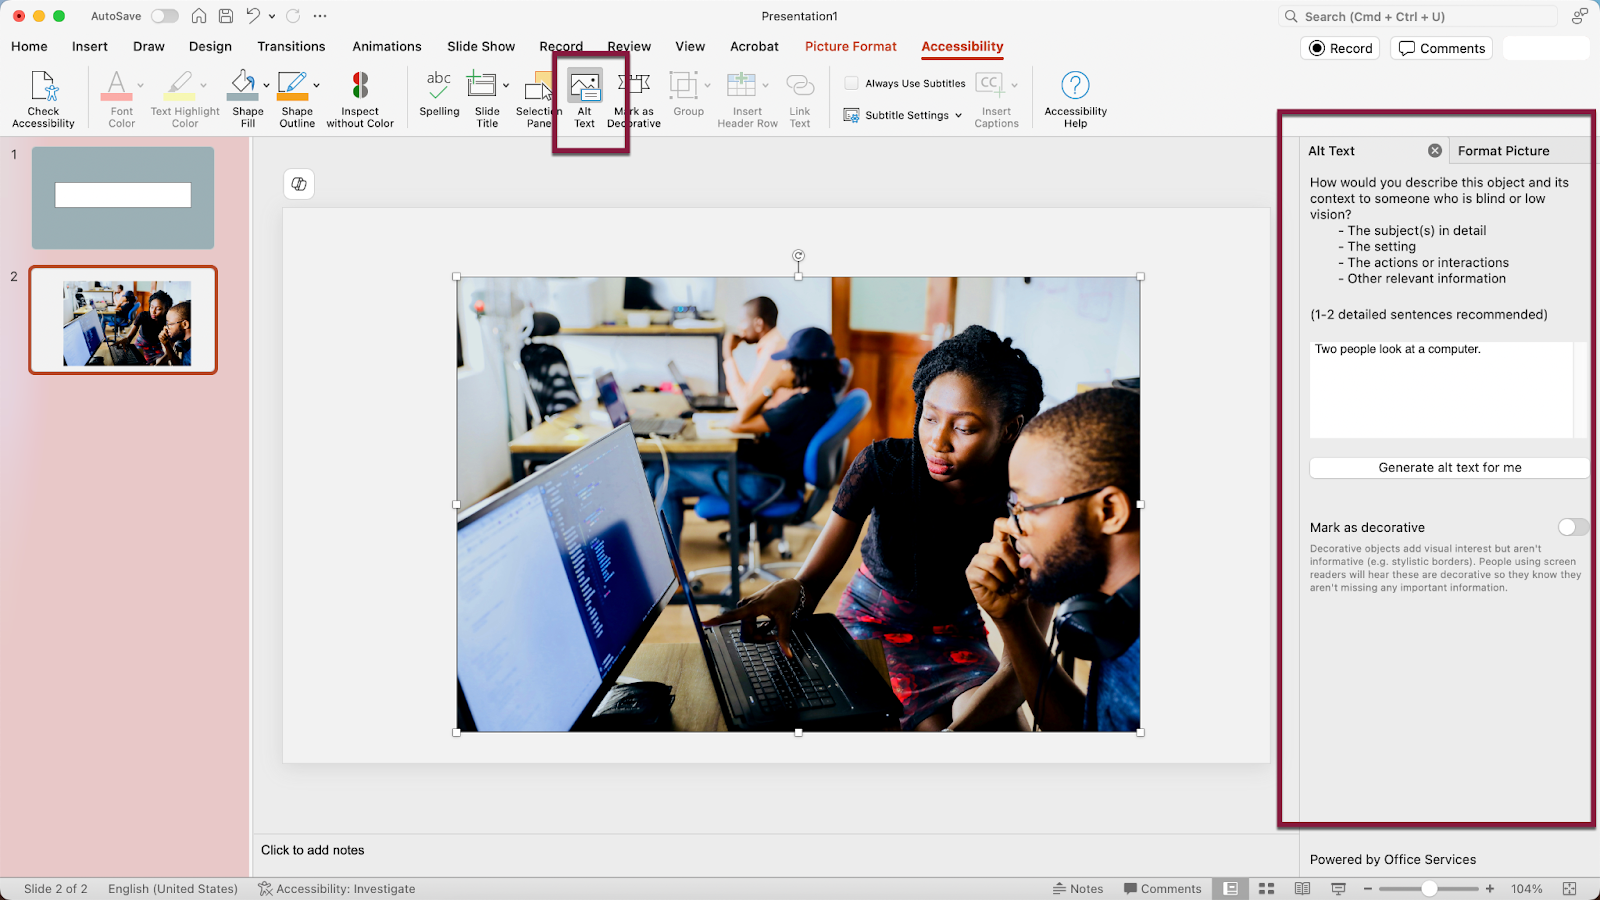
Decorative images and images described elsewhere
Decorative images are those used for visual effect only (eye candy). Decorative images and images described elsewhere (for instance, in a caption or in the content of the slide) should be marked as decorative by selecting the checkbox (Windows) or a toggle (Mac) in the alt text panel on the right. Leave the text box empty. 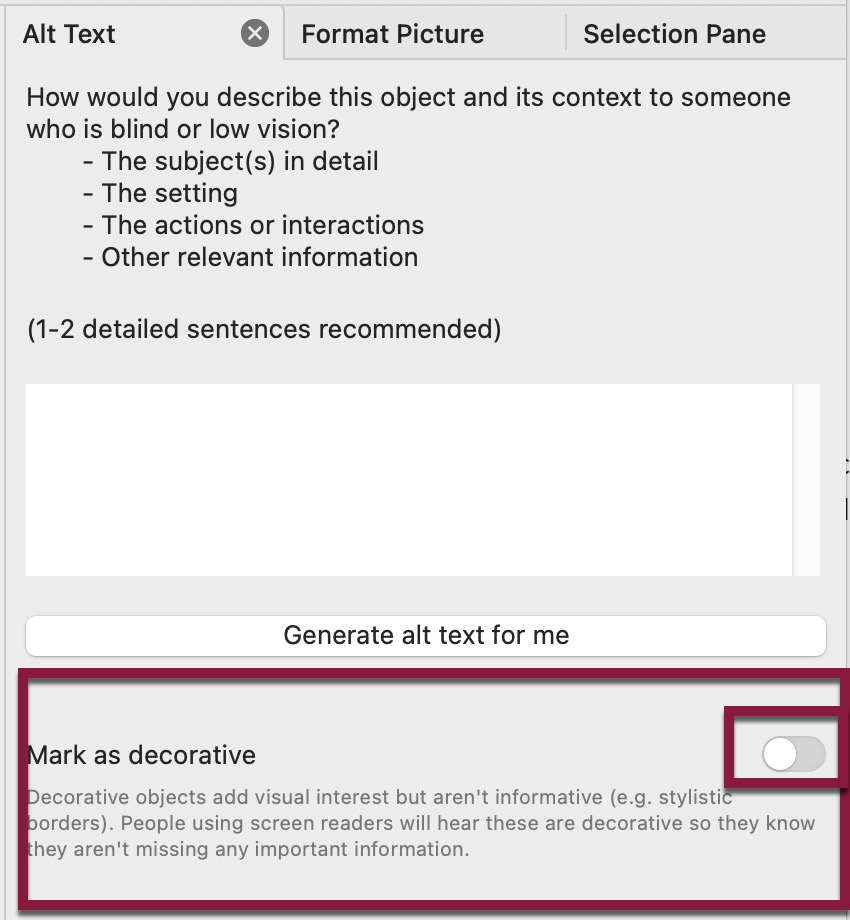
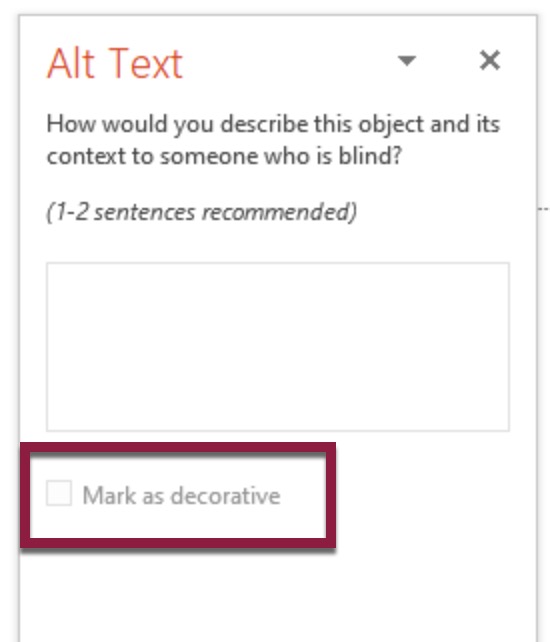
Left image: Mac
Right image: PC
For more on which images need alternative text and how to write effective ALT text, see Images: Alt Text.
Create accessible charts and graphs
We recommend always creating charts in PowerPoint to take advantage of an important accessibility feature. Like images, most charts are not accessible to screen readers; however, charts built within PowerPoint have corresponding data tables that are accessible and can be added to the slide.
To create a new chart in PowerPoint:
- On the Insert tab, select Chart.
- Choose the chart type you want.
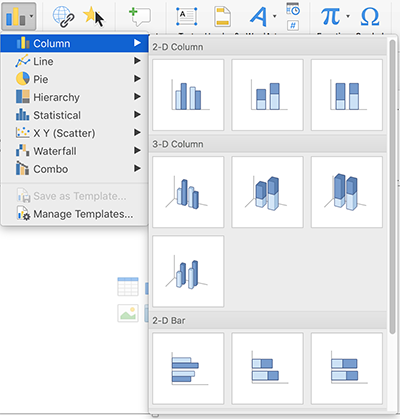
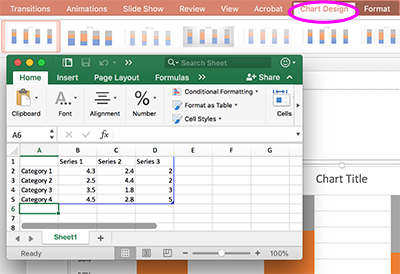
- When you select the chart type, the Chart Design toolbar opens, the chart is inserted into the slide, and Microsoft Excel opens. Enter your data in the Excel data table, remembering to add labels for rows and columns.
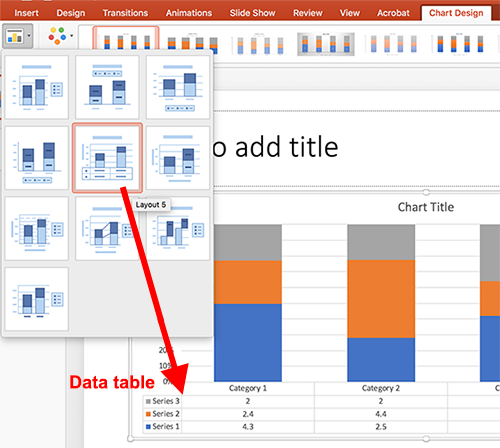
- Next, insert the data table below the chart so that people who use screen readers can access the data:
- On the Chart Design tab, select Add Chart Element.
Select Data Table. The data table will automatically be inserted onto the slide.
- On the Chart Design tab, select Add Chart Element.
Because charts are images, you must an ALT text to it. For charts that have a corresponding data table, add an empty ALT tag by following the instructions in #3 above. If you haven't supplied alternative text elsewhere on the slide, add alternative text describing the chart to the ALT tag, as explained in #3 above.
Create accessible tables
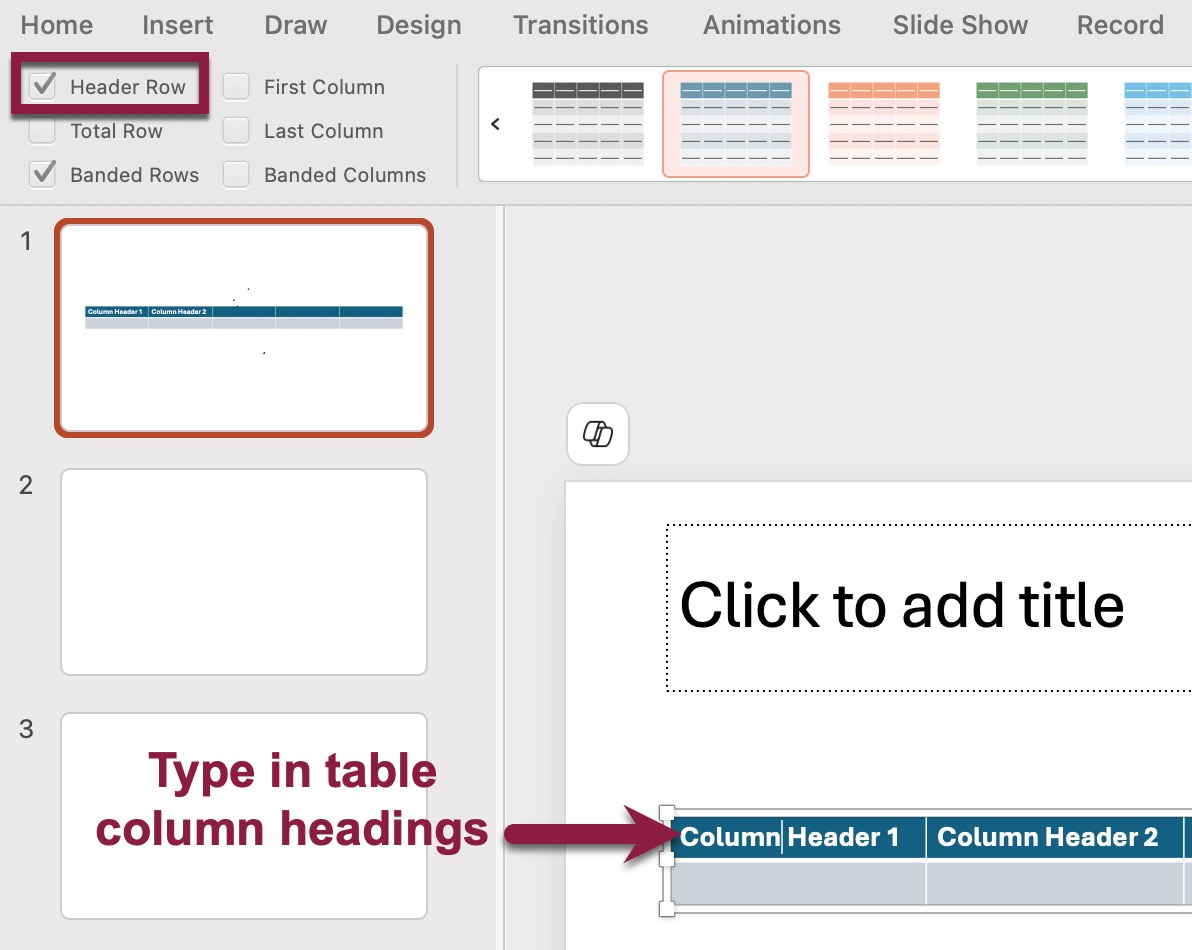
To add a new data table to a slide, always use Insert Table. On the Insert tab, click Insert Table.

- When the new table is inserted, the Table Design toolbar will automatically open.
- Make sure Header Row is checked.
- Provide column headers for your data table directly on the table.
Provide video captions
To make videos accessible in PowerPoint, post a link to a version of the video with captions (for instance, to a copy of the video on YouTube). You can embed videos with captions from MediaPlus. Also, make sure to provide a transcript file for the video (a transcript can be generated in YouTube and MediaPlus).
Audio descriptions
For animations and videos that convey important information visually without spoken narration, provide audio descriptions of the visual content. If the video is embedded in a presentation (e.g., PowerPoint), include the descriptions in the Speaker Notes pane so screen reader users or presenters can access and share that information with individuals who are blind or have low vision.
Create accessible content
- Keep content brief and to the point. Slides with too many images or too much text can increase cognitive load and prevent full comprehension and retention.
- Use standard, non-decorative fonts. For readability, sans-serif fonts such as Arial, Verdana and Helvetica are preferable. See more about typography.
- Keep the font color foreground-to-background contrast high. Check color contrast.
- Use the bulleted or numbered lists styles.
Run the Microsoft Accessibility Checker
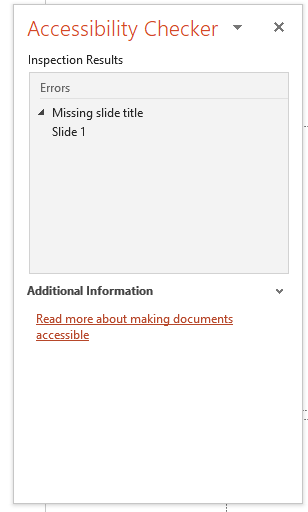
The Microsoft Accessibility Checker is very useful for finding accessibility problems with MS Office files. We highly recommend running the checker over your slides before publishing them. If issues are found, step-by-step instructions are provided for fixing them.
To run the MS Office Accessibility Checker:
- On the Review tab, click Check Accessibility.
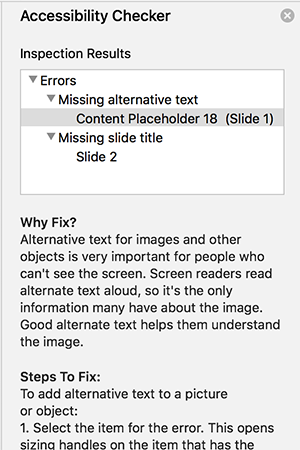
- The Accessibility Checker pane will display in the right-hand sidebar. Follow the instructions to fix each issue.
Left image: Mac
Right image: PC
Read more about the Microsoft Office Accessibility Checker.
Creating a PDF from a PowerPoint file
If you need to create a PDF of a Microsoft PowerPoint file, follow the detailed instructions on how to make accessible PDFs from created documents.
Note: Never use "Print as PDF" to create a PDF from any software or browser. The resulting PDF is not accessible.
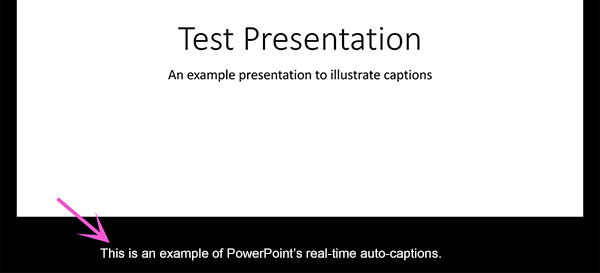
Enable real-time captions in PowerPoint
When you are presenting to an in-person audience, you can enable auto-captions as well as subtitles in another language to appear directly on your slides. This can be helpful if there's a lot of competing noise in the environment or for audience members who are hard of hearing or who speak another language.
Follow Micorsoft's instructions for enabling captions and subtitles in PowerPoint for Windows, Mac and Web.
Note: PowerPoint auto-captions do not meet ADA requirements for accommodations. If you get a request for accommodations:
- Students: If a student who is registered with SAILS requests an accommodation, notify SAILS and work with the student's Disability Access Consultant to meet the student's needs.
- Employees: If an employee requests an accommodation, contact the Office of Diversity, Equity and Inclusion.
- Members of the public: If a member of the public requests an accommodation, contact SAILS for advice on providing accommodations and possible referrals.
Resources
- Microsoft: Create more accessible PowerPoint slides
- Microsoft: Present with real-time, automatic captions or subtitles in PowerPoint
- WebAIM's PowerPoint Accessibility